Thursday, 1 September 2011

Last Chance List!

I love this time of year!!

So the last chance list is out.  We know what isn't making it into the beautiful new catalogue and some of it is even reduced!

Here it is!


If you would like to order anything from it, please email me, you can get it sent straight to your home or delivered to your door if you live locally.

I'm having two last chance workshops.  One on Sept 8th at 7pm in Brae, one on Thurs Sept 15th in Lerwick at The Havly Cafe.  Please let me know if you would like to attend any of these?  I will also be selling off my own retiring sets at a discount so you don't even have to wait!

Look forward to hearing from you.  I'm at paperworks@hotmail.co.uk or on 01806 522482

Rhoda xx

Monday, 29 August 2011

Photo overload and a Last Chance List!

I'm actually a little scared to start blogging again as I have so much to catch up on it's a little daunting!  And when I went to upload photos to put on here I had 575 on my phone!  Don't worry, I'll only post a few but which ones!?

Well, we have had three weeks of great Summer Camp in Shetland with children from all over the islands.  Then Shetland was host to the Tall Ships, which was really great (although the weather was a little chilly!)


It was then my sister's wedding so a mad preparation week of crafting (who am I kidding?! It was great!  I had to craft through the day, which meant my long suffering and amazing husband looked after our boys for nearly a week!)

The big day was lovely, I got to see all my family at the same time (last time I was on the mainland was May 2010) and got caught up with some great friends too. 

My sisters Lydia and Naomi on the Hen do.


My aunt Esther decorated this cake (my Grandma made it).  Awesome!  She takes orders...


My sister Lydia and I (Grandma made the dresses too!)


(sorry no photos of my fabulous sister and brother in law on my phone, check out my facebook page x)

After that we had some lazy days in Northampton, including a workshop with my first mainland downline Amanda (who is also my cousin's wife) and had a lovely evening, where I was very inspired by so many of her samples and ideas and will possibly CASE several if not all of them!

After that we travelled to York, where we had a few family days together. 

The Shambles...

The Roman walls...

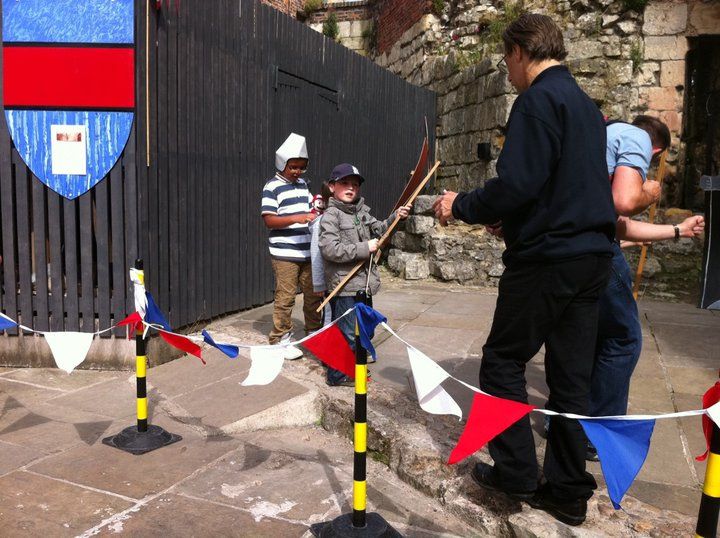
At York Castle Museum, the blade is very old and still sharp! Hmm...wonder if they know what they're doing?!


Jude in the courtyard.

Will doing a bit of archery...


Ethan jousting...

Ethan at Forbidden Corner...


St Cliffords Tower in York...


 Bamburgh Castle in Northumberland...


Then a few days at my inlaw's home near Inverness.

Will and Ethan enjoying ice lollies at the Landmark Centre.


Ethan in the maze

Alasdair jumping of the skydive (with a harness on)


So now I'm back, rested, raring to go with next month's classes and last chance list workshops!  So very exciting.

The Last Chance List is a fabulous list of great sets and accessories from the current catalogue that are retiring on Sept 30th.  They are unavailable after that and sometimes reduced!  It's only for a month so check the website http://www.stampinup.co.uk/ on Sept 1st or email me. 

Also...

I'm planning to hold classes on each Weds evening at 7pm on the following dates:  Aug 31st, Sept 7th, 14th, 21st and 28th (tab at top with more details to follow shortly), with a last chance list workshop on Thursday 8th at 7pm.

Please please let me know asap if you would like to host as I can fit in around you and it means you get all the freebies (and possibly even more goodies than usual as some things may be reduced!)

Contact me at paperworks@hotmail.co.uk or on 01806 522482

Thanks for visiting me, let me know you were here x

Rhoda xx

Friday, 8 July 2011

Scallop Circle Roses

I apologise sincerely for my extreme neglect of my little blog... I'm so sorry, I don't know where the time has gone!  In the last little while we have redecorated our front room and dining room (in a day and a half as my mum and dad were coming to stay and the builders came a week late!) Then we had my lovely parents up for a week.  This is a real treat and we wanted to put everything aside as I hadn't seen them for a whole year!

Then we had end of terms sports days, leaving day and the start of our Summer Camp which lasts for 3 weeks.  It has been busy.

But... in amongst that we have had lovely workshops at Carol and Pamela's as well as at home when my mum was up (first time she's ever been to mine so very exciting!)

So I've decided to show you what I've been making and demonstrating a lot lately.  When I first saw the Scallop Circle die in the Mini Catalogue, I knew immediately it could be used for a flower.  I got the idea from a smaller die that Sizzix do (not SU) but Stampin' Up's one is FAR better!

Here's what we made...


And here is a photo heavy tutorial (as I'm camera shy and not wanting to video it!)

Put your chosen felt through the Big Shot with the Scallop Circle die and draw this outline on it.  (I've shown this part on card as it's easier to see)  Draw the first ring of bumps close to the edge then as you go down a row make the bumps wider (so the petals are bigger on the outside of the flower) and increase the distance between each ring of the spiral (so the petals are smaller in height in the middle and larger at the outside)


 Then cut your felt along the lines until you reach the middle, turn your shape over (so pen marks on the back) and place the cut edge furthest away at the top (as per the photo below)
 Start to curl the felt around in a spiral as loose or tight as you'd like.  If you are unhappy with loose, try tighter and vice versa.


When you have spiraled up all your felt you end up with a circular piece that acts as a flap at the bottom.  I add glue to the edges of all your spirals (as shown below) and also the inside of the flap.  Tombow is great for this unless you are not using wool felt.  The poorer the felt quality, the stronger the glue you'll need.


This is with the flap glued into place, note the pen markings are underneath.


Then hand cut some felt leaves and glue one shorter one on the base of your flower. covering any pen markings.  Then with a slightly longer felt leaf, slide the brooch pin on and secure the pin to the base with the leaf (as per the first photos). 

Voila!   A beautiful brooch!  Carol and Pamela both wanted to try these at their workshops and we added pretty stamped tags and seam binding ribbon as a little extra!  Have a look...


Here were some of theirs.  Utterly gorgeous!  I'm afraid of crediting them incase I make a mistake but I'll try...

Carols
 James'
 Eleanor's
 Pamela's
 Amanda's
 Julie's

Sorry to everyone's who I didn't get on here, they were all gorgeous.

 
And the Nature's Walk card I demonstrated on the night...


Recipes for Roses:  Big Shot!
Scallop Circle Die
Tombow adhesive
Tiny Tags set
Jewellry tag punch
Linen Thread
Baja Breeze Seam Binding Ribbon
extras:  Brooch back

Recipe for card:
Nature's Walk set
Subtles Write Markers
Early Espresso cardstock and ink
3/4" circle punch
Pocket Silhouettes hostess set
Scallop Border Punch
Early Espresso Taffeta Ribbon
Very Vanilla Cardstock
Notecard and envelope

If you would like to order any of these items, or host a workshop and make a brooch for yourself, please contact me at paperworks@hotmail.co.uk

If you get in quick you just may get the £20 extra hostess benefits my last two hostesses got!  Imagine your Scallop Circle die and the Nature Walk set (or whatever you've got your heart set on) for free! Just by inviting people over!  Plus we usually eat a lot of these...


I'll be back tomorrow with a decorated journal and some more recent makes.  Let me know what you think and that you were here!

Rhoda x

Sunday, 12 June 2011

Beautiful ribbon brooches

At my workshop on Wednesday we did a Make and Take with a difference!  We made satin ribbon brooches!  The idea is a CASE of my upline Amanda's original, you can see hers here.  I was so delighted with the variety or colours and styles that my attendees made.

Have a look...

Carols...

Amanda's...
 Michelle's...

Rhona's...


My mum's...


Jacqueline's...

Sorry for anyone I've missed as the photos didn't come out well (desperately needing the camera fixed!) 

We changed the original design slightly and cut felt circles with the Big Shot and the Original Circles die.  We adhered the scorched ribbon with sticky tape and super glued the middle and added a pearl or rhinestone.

If you would like to host a workshop and make one of these yourself, please contact me at paperworks@hotmail.co.uk.  All hostesses with sales of £250 or more during June and July will get and extra £20 freebies of their choice!

What are you waiting for?!

Check back through the week for my weekend's makes.

Thanks for dropping by, leave a comment so I know you were here

Rhoda x